This weekend was a very up and down few days
First the downs:
Finished my turbo adapter - went to bolt it up and one of the studs broke out so I had to weld another in. Also when fitted there was a large step in the airflow so I've had to reprofile that too
Filled the tank with diesel - Then spotted the tank had sprung a leak. This is the tank that I'd spent 2 days painting and corrosion protecting So had to spend the next half hour removing the diesel I'd just put in! Now need to fit another thank.
Then the ups:
Finally completed the turbo adapter and it fits. I've even managed to refit the standard oil drain and feeds too.
Temporarily put the dash in and most of it works.
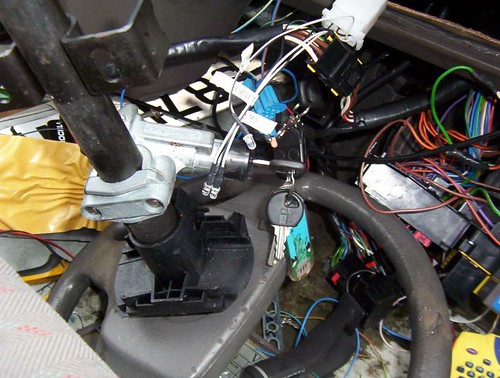
Fitted the new idiot lights (glow plug, immobiliser and Engine management), and they all work as they should!
Then the downs:
When I went to start the car the igntion lights cut out and the immobiliser cuts in. Grrrr
Then the ups:
When the igntion is turned on and the car is manually started (12v feed to the starter), then the engine turns over and even runs!
The throttle pedal also seems to work too!
So progress is definatly being made.
99% of the electrics seem to be working ok, and the bit that doesn't is due to the peculiarity of how the maestro is wired rather than doing anything theoretically wrong (the igntion switched live feed goes dead briefly as the starter is engaged).
Rain stopped play today so if it clears up I'll have a go at fixing it tomorrow and finish off the pipework.
Camper build thread
12. It drives!
Well this weekend was spent righting some of the wrongs of the previous weekend, however there were inevitably some problems too
I fitted a new diesel tank, ran the return fuel lines and finalised the fuel system - even the gauges appears to work! No pics of this I'm afraid.
Then my assistant put the steering column back in as the van needed to be made mobile for next weekend.
Then I went to fit a supplied driveshaft to get it mobile. However the driveshaft is the wrong one. I ended up bodging together various parts from two driveshafts to make one semi-good one. Still at least it makes the van mobile. A word of advice for anyone though, if anyone suggests changing the inner CV joint on the shaft, then politely decline! It was a b*gger of a job even though in theory it should be simple.
Anyway I'll need to fit another one in the future but it'll make it mobile in the short term.
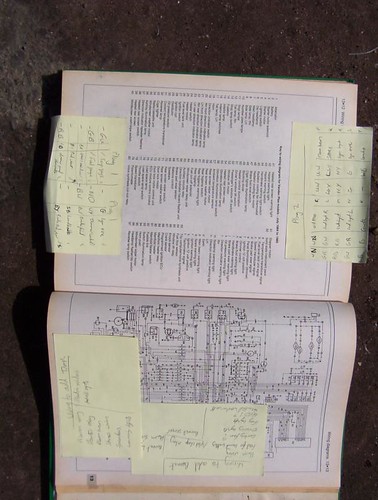
There was a little more wiring to check to make sure the dash worked. The use of post-it notes certainly helped all the way though the conversion. I wonder how on earth we did this sort of thing before they were invented!
Then after some more fiddling and faffing I bravely took it for a test drive.
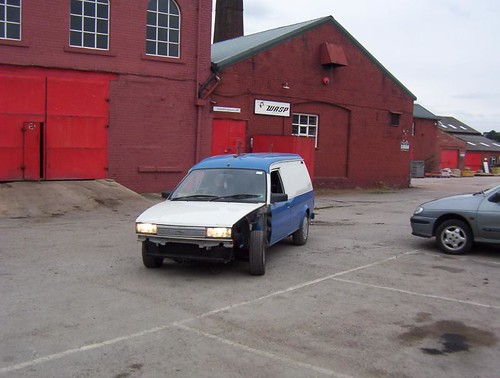
I know there is still a lot of work to do but now that it is mobile then I'm happy that progress has been made.
And for those that want to know what it sounds like.
http://www.youtube.com/watch?v=qTdU6EurFM8
I fitted a new diesel tank, ran the return fuel lines and finalised the fuel system - even the gauges appears to work! No pics of this I'm afraid.
Then my assistant put the steering column back in as the van needed to be made mobile for next weekend.
Then I went to fit a supplied driveshaft to get it mobile. However the driveshaft is the wrong one. I ended up bodging together various parts from two driveshafts to make one semi-good one. Still at least it makes the van mobile. A word of advice for anyone though, if anyone suggests changing the inner CV joint on the shaft, then politely decline! It was a b*gger of a job even though in theory it should be simple.
Anyway I'll need to fit another one in the future but it'll make it mobile in the short term.
There was a little more wiring to check to make sure the dash worked. The use of post-it notes certainly helped all the way though the conversion. I wonder how on earth we did this sort of thing before they were invented!
Then after some more fiddling and faffing I bravely took it for a test drive.
I know there is still a lot of work to do but now that it is mobile then I'm happy that progress has been made.
And for those that want to know what it sounds like.
http://www.youtube.com/watch?v=qTdU6EurFM8
13. Miscellaneous updates
Well some random updates from me today about some of the bits and pieces that haven't yet appeared in this blog.
The first is the cooling. I'm after a reasonable amount of power so I need things to keep reasonably cool.
As you've seen already I had a few issues finding a suitable radiator. Well I managed to find the most suitable one. Its one destined for a maestro turbo which come with 152bhp so should be up to the job. Its also the right size to allow the front mount intercooler to fit.
As the intercooler gets in the way of the standard fan on the front of most radiators the fan must be situated on the back. There isn't a lot of room behind the radiator so the fan has to be a slim one.
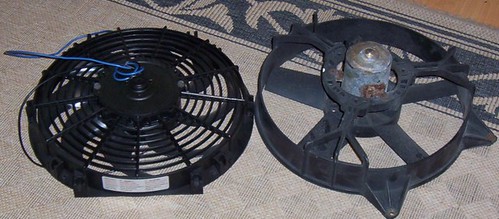
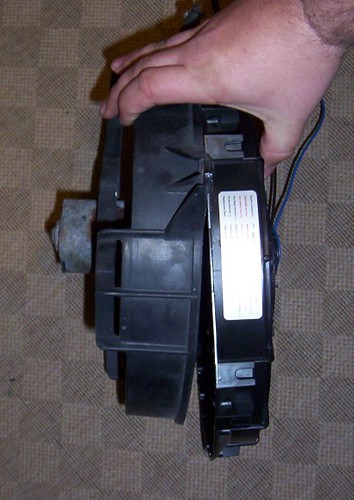
Side by side you can see the difference in the thickness.
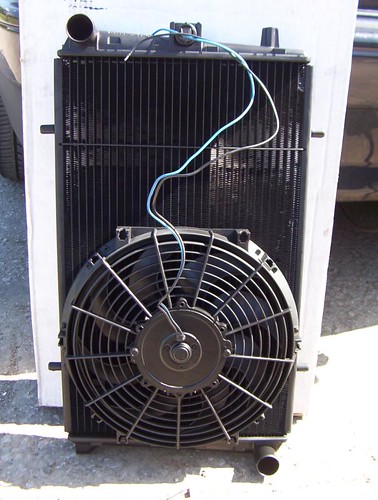
The finished article all mounted and ready for action
As you can see it is a tight squeeze.
The second update is the brakes. I'm putting more power under the bonnet and the standard brakes are pretty woeful (240mm solid discs). So I need something bigger. I've swapped the front hubs to the car setup (this is causing a few headaches but I'll save that for a future update). This means I've swapped the PCD to the maestro car PCD of 3.75 inches. Not a popular size, but the MGF uses it amoungst others so it isn't that bad. Luckily I bagged myself a set of upgraded brakes for the maestro turbo and so I've fitted these.
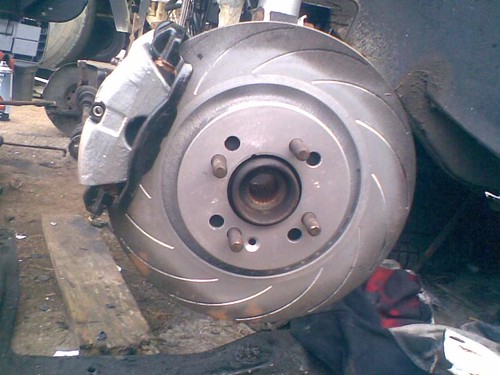
This means it has gone from 240mm solids to 280mm venteds which should keep the extra power under control.
Its a well proven upgrade for the maestro turbo so should be just what I need for my van.
The third thing which I've kept under my hat is that I'm after more power than the standard turbo can support.
So that means a different turbo and this is the one I'm going to test.
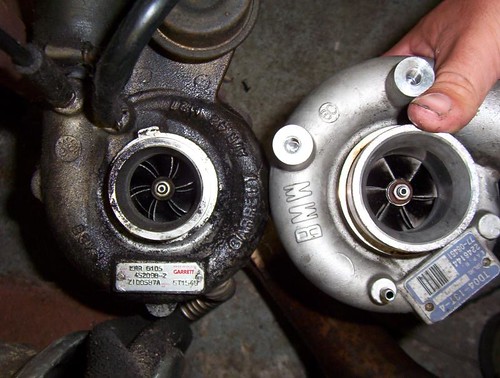
Left = Standard. Right = Proposed upgrade unit.
Untested as yet but it doesn't smoke and makes boost so time will tell how laggy it is.
The first is the cooling. I'm after a reasonable amount of power so I need things to keep reasonably cool.
As you've seen already I had a few issues finding a suitable radiator. Well I managed to find the most suitable one. Its one destined for a maestro turbo which come with 152bhp so should be up to the job. Its also the right size to allow the front mount intercooler to fit.
As the intercooler gets in the way of the standard fan on the front of most radiators the fan must be situated on the back. There isn't a lot of room behind the radiator so the fan has to be a slim one.
Side by side you can see the difference in the thickness.
The finished article all mounted and ready for action
As you can see it is a tight squeeze.
The second update is the brakes. I'm putting more power under the bonnet and the standard brakes are pretty woeful (240mm solid discs). So I need something bigger. I've swapped the front hubs to the car setup (this is causing a few headaches but I'll save that for a future update). This means I've swapped the PCD to the maestro car PCD of 3.75 inches. Not a popular size, but the MGF uses it amoungst others so it isn't that bad. Luckily I bagged myself a set of upgraded brakes for the maestro turbo and so I've fitted these.
This means it has gone from 240mm solids to 280mm venteds which should keep the extra power under control.
Its a well proven upgrade for the maestro turbo so should be just what I need for my van.
The third thing which I've kept under my hat is that I'm after more power than the standard turbo can support.
So that means a different turbo and this is the one I'm going to test.
Left = Standard. Right = Proposed upgrade unit.
Untested as yet but it doesn't smoke and makes boost so time will tell how laggy it is.
14. More random updates
Some of the more engineering orientated people may have winced when they saw my temporary engine mount.
I said it was temporary at the time and some people would have left it till it fell apart. However I want this build to be a quality one and so I knocked up a new mount "spacer" for it to make something suitable for permenant use.
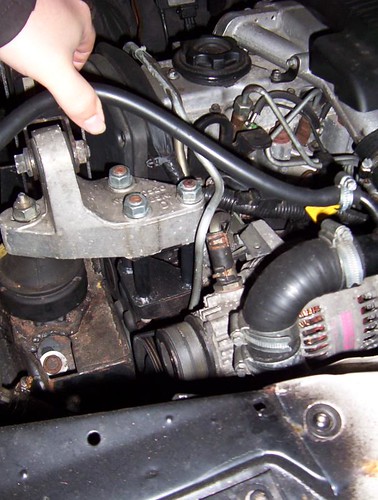
Much more rigid and secure I'm sure you'll agree.
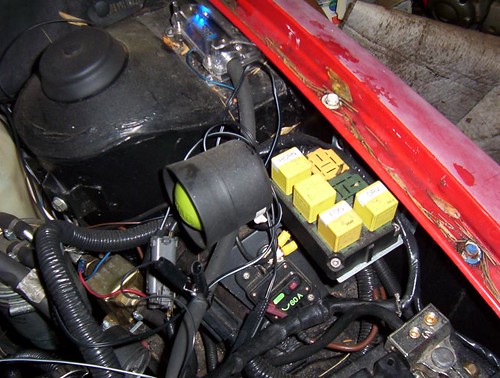
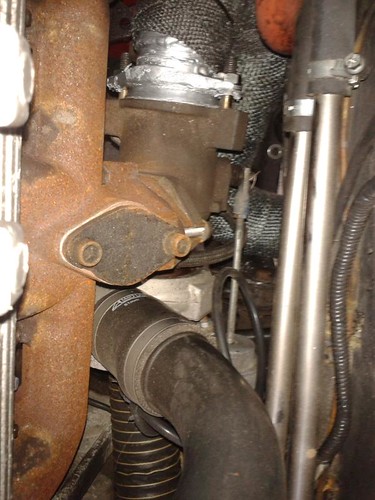
As you'll have seen there is a lot of electrical work in this project. And security is one of them. The maestro van has no security as standard, so i've fitted a good diskloc and a good cat 1 alarm and immobiliser. This is on top of the standard rover 600 immmobiliser system which I have also retained. So in short unless you have the keys and the fobs it isn't going anywhere! The alarm has also been wired with the nice-to-haves such as full closure. There are a couple of other functions left to wire up on the alarm once I've decided what I want them to do (boot release, courtesy headlamps, etc etc). The wiring is a bit of a mess still as it isn't all finished off but most of it is done and now just needs tidying up and looming up and securing. If you look carefully you can also see my fuel lift pump which should ensure a good supply of fuel to the pump which I view as essential in reliable good power figures.
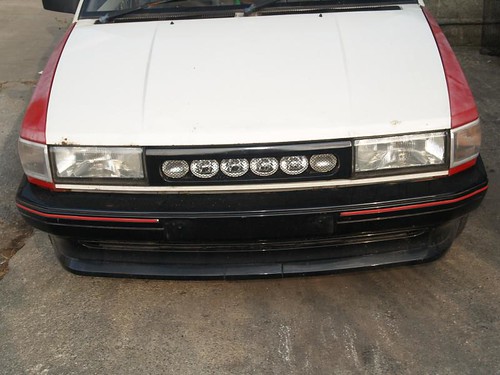
Maestro headlamps are ok but not wonderful so I've added some spotlights for the winter months. Well ok quite a few spotlamps. Naturally these have all been wired properly with a circuit breaker and seperate relays for spot and fog lamps as seen above.
Naturally I want my campervan to be a nice place to be inside so I've altered the interior a little too.
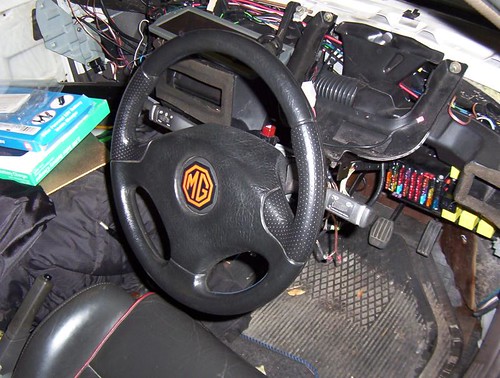
A smaller nice leather steeringwheel fortunatly with the MG logo on, has been bought and fitted.
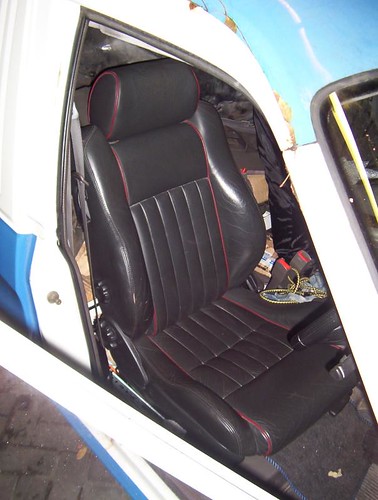
Also to match the leather wheel are some nice comfy leather recaro type seats.
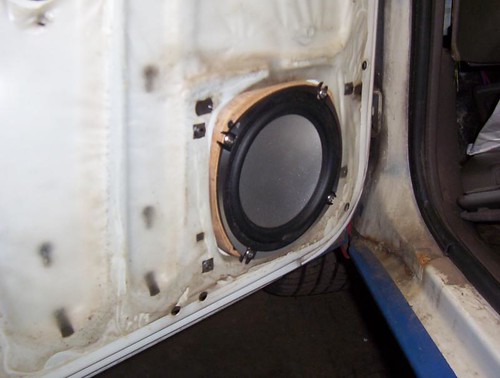
And of course for those long journeys some nice tunes will be required. So I've fitted some nice SPL dynamics component speakers along with an infinity amp to power them. The headunit will be a JVC one but I've not yet fitted that as the dash is still work in progress. You'll see why in a later update!
I said it was temporary at the time and some people would have left it till it fell apart. However I want this build to be a quality one and so I knocked up a new mount "spacer" for it to make something suitable for permenant use.
Much more rigid and secure I'm sure you'll agree.
As you'll have seen there is a lot of electrical work in this project. And security is one of them. The maestro van has no security as standard, so i've fitted a good diskloc and a good cat 1 alarm and immobiliser. This is on top of the standard rover 600 immmobiliser system which I have also retained. So in short unless you have the keys and the fobs it isn't going anywhere! The alarm has also been wired with the nice-to-haves such as full closure. There are a couple of other functions left to wire up on the alarm once I've decided what I want them to do (boot release, courtesy headlamps, etc etc). The wiring is a bit of a mess still as it isn't all finished off but most of it is done and now just needs tidying up and looming up and securing. If you look carefully you can also see my fuel lift pump which should ensure a good supply of fuel to the pump which I view as essential in reliable good power figures.
Maestro headlamps are ok but not wonderful so I've added some spotlights for the winter months. Well ok quite a few spotlamps. Naturally these have all been wired properly with a circuit breaker and seperate relays for spot and fog lamps as seen above.
Naturally I want my campervan to be a nice place to be inside so I've altered the interior a little too.
A smaller nice leather steeringwheel fortunatly with the MG logo on, has been bought and fitted.
Also to match the leather wheel are some nice comfy leather recaro type seats.
And of course for those long journeys some nice tunes will be required. So I've fitted some nice SPL dynamics component speakers along with an infinity amp to power them. The headunit will be a JVC one but I've not yet fitted that as the dash is still work in progress. You'll see why in a later update!
15. Dashboard painting
Anyone who is familiar with maestros/montegos know they have a habit of warping and cracking their dashboards.
Sadly my van is not immune to this and has two sizable cracks and a couple of very minor ones.
So in order to stop them spreading (as they do), I drilled a hole at each end of the crack.
This is done to relieve the stress at the crack tip and help prevent it from growing further.
Then I filled each crack with epoxy resin as best I could.
Then the remaining crack I filled with stopper to disguise it the best I could (sorry no pics of this)
I am changing the colour of the dash to match the steering wheel and generally avoid as much of the dark grey/brown dash as I possibly can.
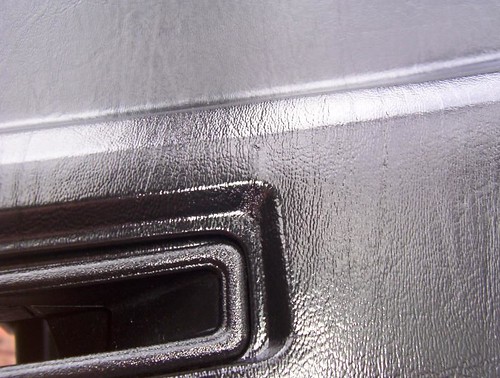
Next job was to paint/dye the original vinyl of the dash black. As dashboards are quite frequently soaked in silicones to make them nice and shiney, and they are also textured, this makes the job of removing all the silicones quite tricky!
Plenty of scrubbing with flash and water got most of it "clean". Then a good wipe down with panel wipe to remove what I hoped was the last traces.
Then I sprayed the dash carcass. At the time of writing I've only done the first coats but it looks pretty good. I need more paint though and the shop only had one can of vinyl paint in stock (its fairly unusual stuff).
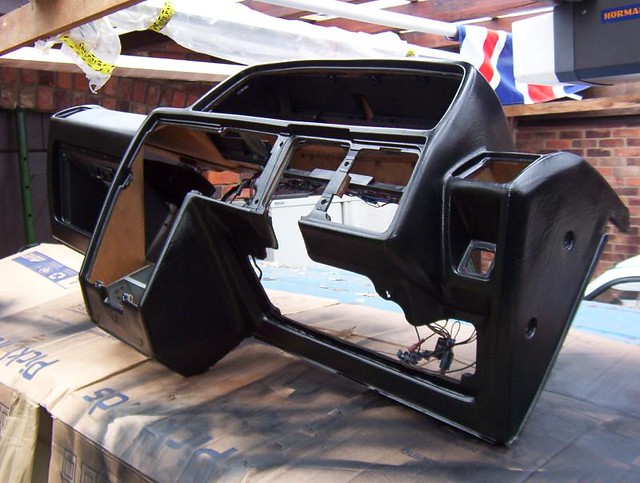
Also I've got to paint the "hard" plastics to match, so the same procedure is applied to the hard plastics such as the centre console, the glove box and fuse box lids and the steering column surround as well as the seatbelt stalks too.
These can be painted with normal paint though (in this case satin black).
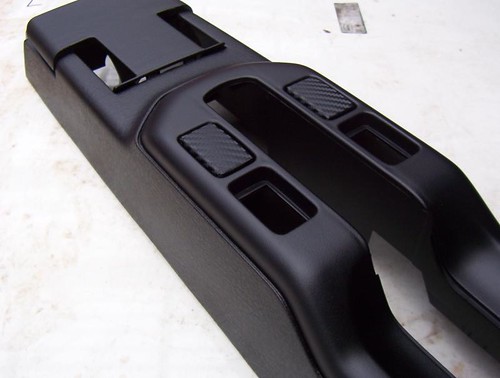
The next job is to assemble it all!
Before:
After:
Sadly my van is not immune to this and has two sizable cracks and a couple of very minor ones.
So in order to stop them spreading (as they do), I drilled a hole at each end of the crack.
This is done to relieve the stress at the crack tip and help prevent it from growing further.
Then I filled each crack with epoxy resin as best I could.
Then the remaining crack I filled with stopper to disguise it the best I could (sorry no pics of this)
I am changing the colour of the dash to match the steering wheel and generally avoid as much of the dark grey/brown dash as I possibly can.
Next job was to paint/dye the original vinyl of the dash black. As dashboards are quite frequently soaked in silicones to make them nice and shiney, and they are also textured, this makes the job of removing all the silicones quite tricky!
Plenty of scrubbing with flash and water got most of it "clean". Then a good wipe down with panel wipe to remove what I hoped was the last traces.
Then I sprayed the dash carcass. At the time of writing I've only done the first coats but it looks pretty good. I need more paint though and the shop only had one can of vinyl paint in stock (its fairly unusual stuff).
Also I've got to paint the "hard" plastics to match, so the same procedure is applied to the hard plastics such as the centre console, the glove box and fuse box lids and the steering column surround as well as the seatbelt stalks too.
These can be painted with normal paint though (in this case satin black).
The next job is to assemble it all!
Before:
After:
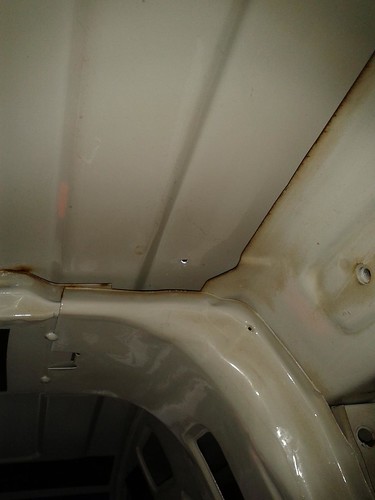
16. Rust repairs
Very slow (aka no) progress on this in an age, however I spent the weekend welding up some dodgy build quality issues and beefing up the front turrents.
Also got some exhaust ideas and started tidying up some of the wiring too.
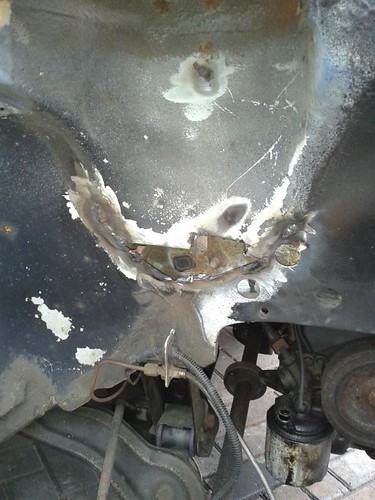
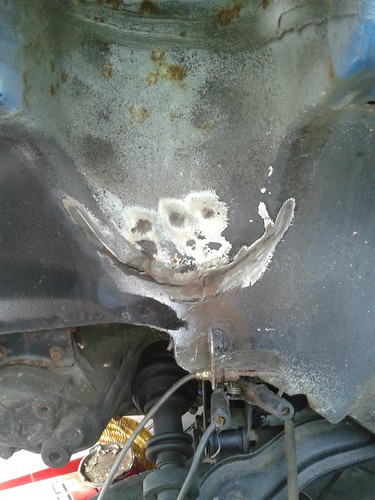
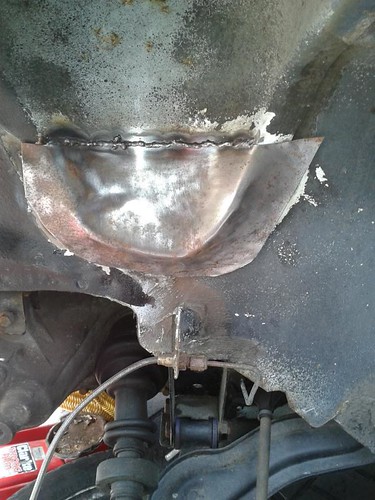
Front turret (drivers side)
Before
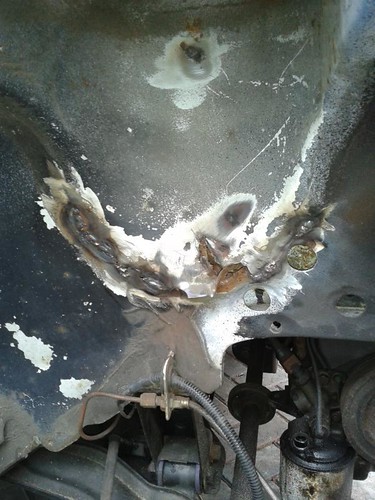
During
After (just needs paint)
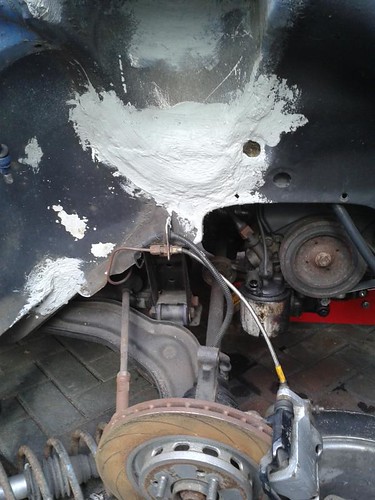
Passenger Side
Before
During (sorry missed the shots of the repair pieces under the big cover plate below)
After
Also got some exhaust ideas and started tidying up some of the wiring too.
Front turret (drivers side)
Before
During
After (just needs paint)
Passenger Side
Before
During (sorry missed the shots of the repair pieces under the big cover plate below)
After
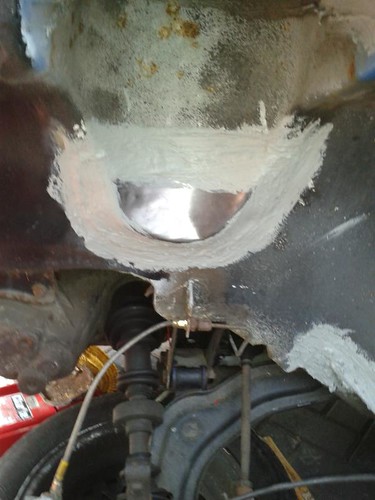
17. Downpipe fabrication
Well a mini update tonight.
Today I've been making the long awaited downpipe. It is a job I don't like doing as it requires lots of test fitting, adding a bit, test fitting, removing a bit, test fitting etc etc.
Anyhow here is the progress so far.
Only tack welded at the moment, but once I'm sure it'll all fit it'll get welded up and painted.
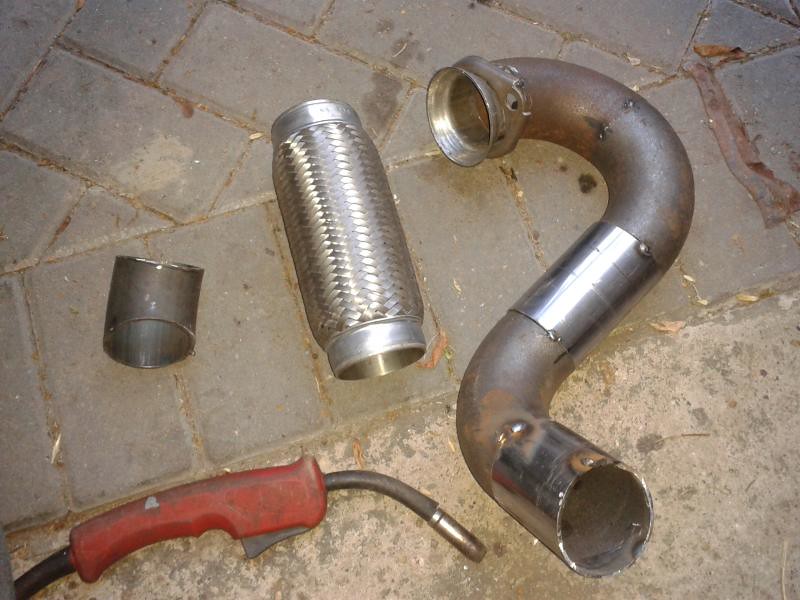
Watch this space
Today I've been making the long awaited downpipe. It is a job I don't like doing as it requires lots of test fitting, adding a bit, test fitting, removing a bit, test fitting etc etc.
Anyhow here is the progress so far.
Only tack welded at the moment, but once I'm sure it'll all fit it'll get welded up and painted.
Watch this space
18. Downpipe fabrication Pt II
Well I think it is finally done. Well I hope it is!
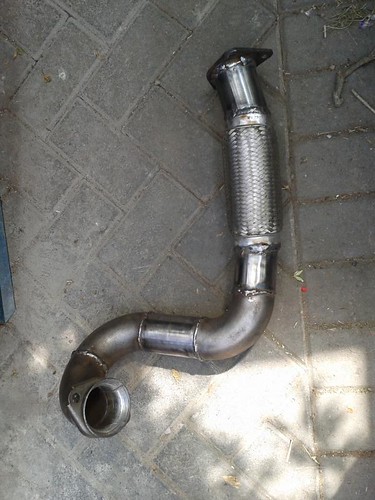
All welded up after a lot of trial fitting and adjustment!
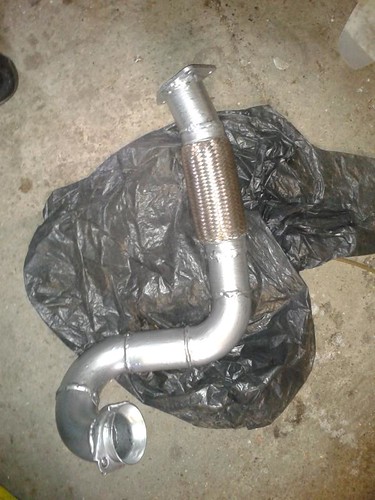
A quick lick or two of high temperature aluminium paint
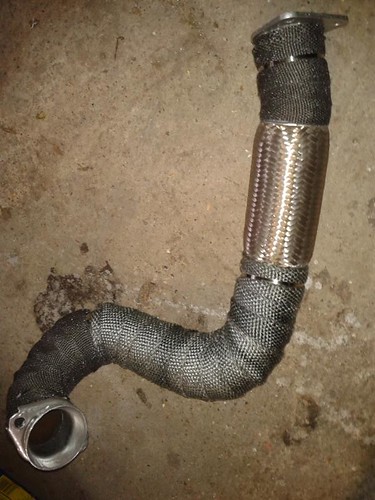
And finally heat wrapped to reduce underbonnet temps and stop it cooking my PAS pipework.
Its a damn tight squeeze to get it all in there!
All welded up after a lot of trial fitting and adjustment!
A quick lick or two of high temperature aluminium paint
And finally heat wrapped to reduce underbonnet temps and stop it cooking my PAS pipework.
Its a damn tight squeeze to get it all in there!
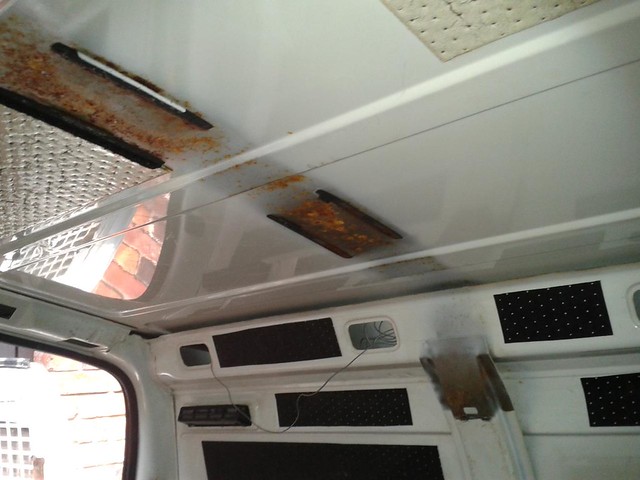
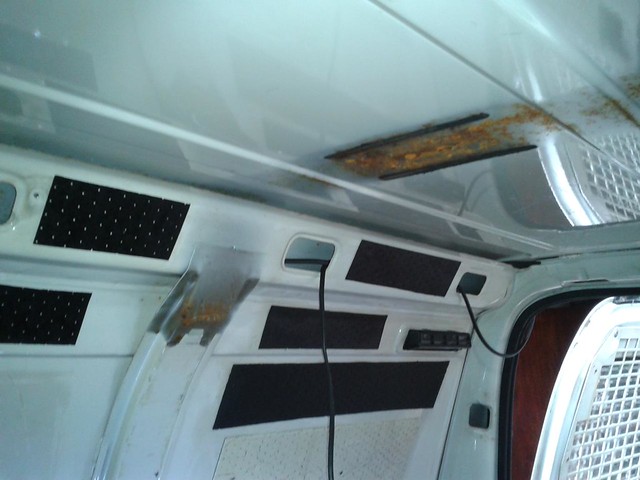
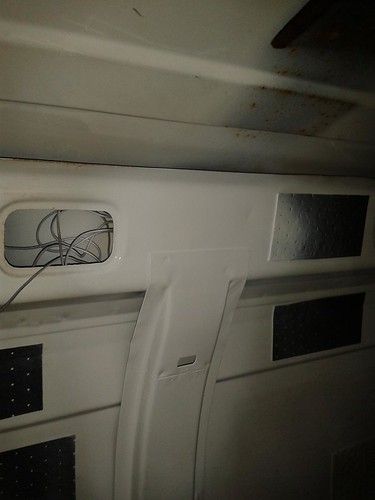
19. Soundproofing
Well this update is just about making the van a little quieter.
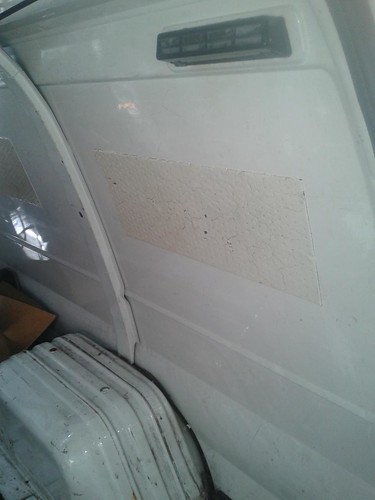
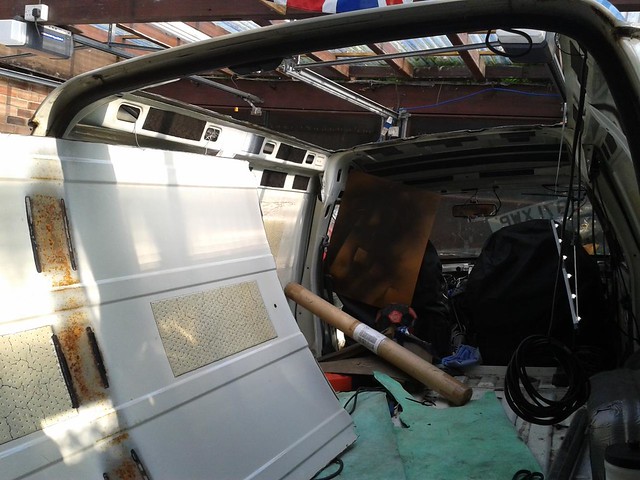
The van is quite loud in the back as it has a lot of metal panels that resonate and create a drumming noise. To get rid you need to add damping material. There is some there from the factory but not a lot.
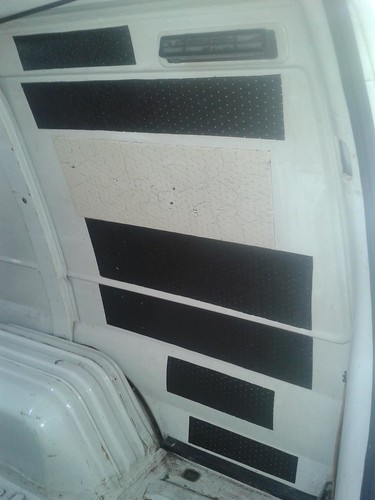
Here you can see I've added a little!
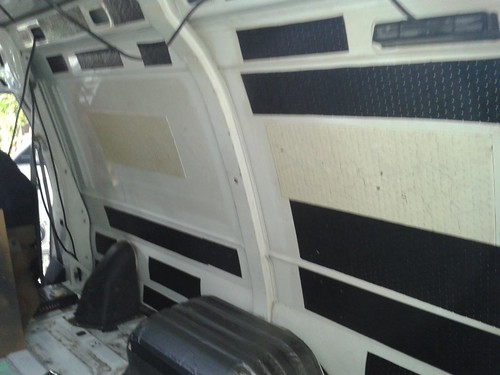
Original sound deadening - (painted white)
Completed corner
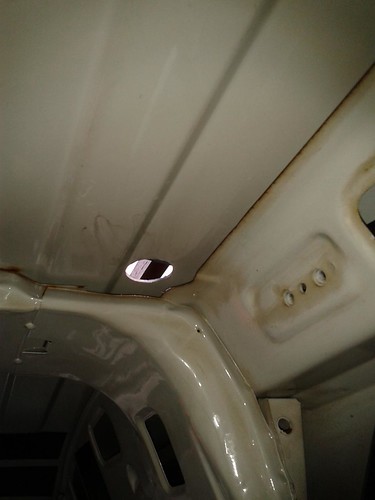
The wheelarch has no damping as standard.
Midway through you can see damping material applied to the inner edge
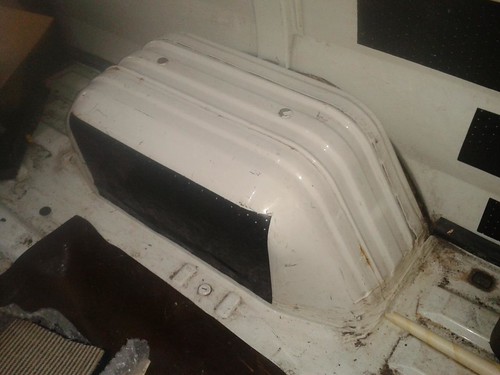
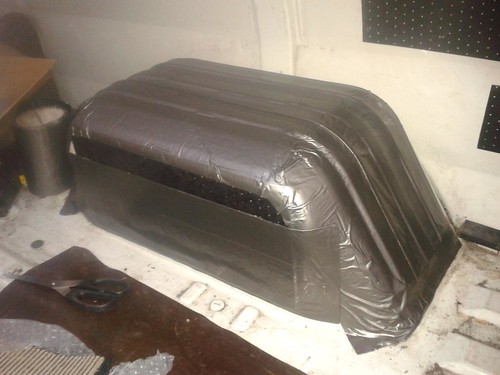
Damping material added to both the inner edge and around the outside.
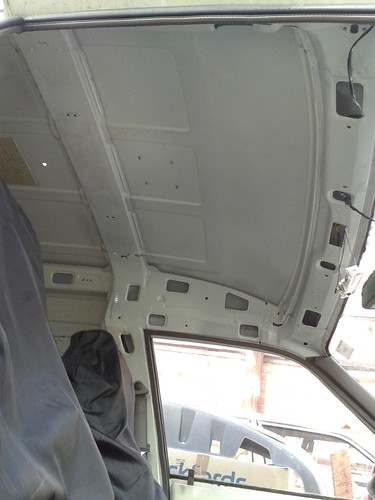
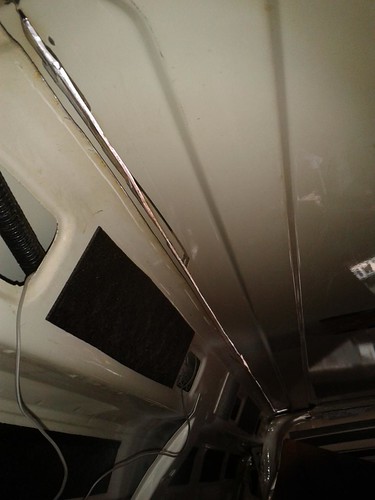
The roof panel is also very "tinney" and has no damping fitted as standard
Midway through you can see the additional damping material
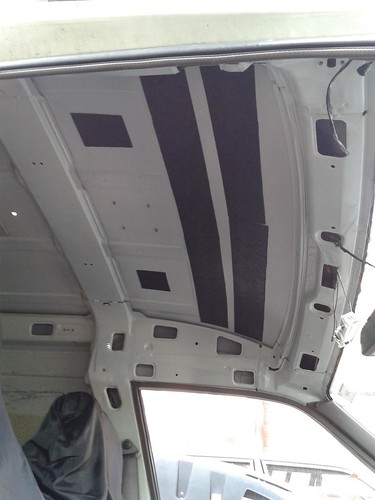
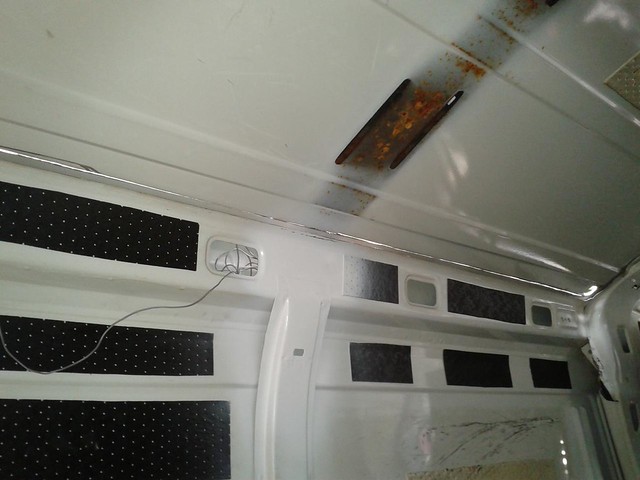
And completed. It sounds a lot less tinney now and should drum a lot less when on the move.
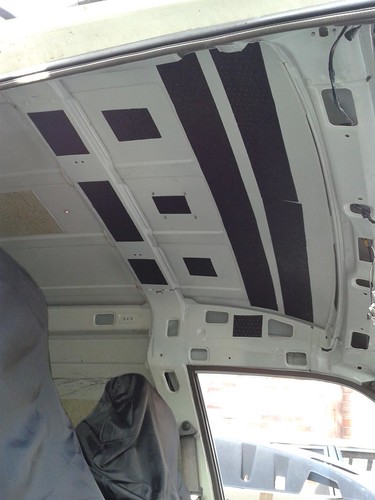
Completed the damping looks like this
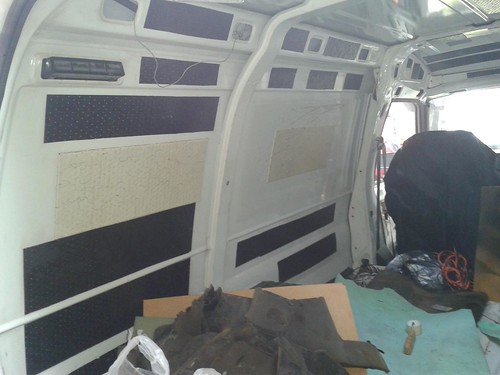
The van is quite loud in the back as it has a lot of metal panels that resonate and create a drumming noise. To get rid you need to add damping material. There is some there from the factory but not a lot.
Here you can see I've added a little!
Original sound deadening - (painted white)
Completed corner
The wheelarch has no damping as standard.
Midway through you can see damping material applied to the inner edge
Damping material added to both the inner edge and around the outside.
The roof panel is also very "tinney" and has no damping fitted as standard
Midway through you can see the additional damping material
And completed. It sounds a lot less tinney now and should drum a lot less when on the move.
Completed the damping looks like this
20. Structural alterations
Well I've been putting it off as long as possible but the time has come to get the angle grinder out
You can just see the roof brace in the top of this picture.
Well now you can see it on the floor!
As you can see it wasn't painted under there from the factory.
Well I can't have rust and unpainted metal. It'll all be covered so it doesn't need to match perfectly.
The next daunting step is to turn my van into a convertible. Never have the words - "Measure twice - cut once" meant so much. Any mistakes at this stage could be very difficult or impossible to fix.
We start by drilling a pilot hole at the appropriate place in each corner of the roof section
Then enlarge the hole with a hole saw to give a nice curve at each corner (when it is finished).
Then I break out the angle grinder and carefully slit the roof section out. Seeing daylight coming through is a slightly odd feeling. But needs must!
Well there is definatly no going back now! The roof panel is actually quite heavy.
A view you don't often get! The bare metal edges need sorting out
So I stripe painted the edges with zinc primer to protect them. The area will all be covered and internal to the van so it doesn't need to be too pretty.
So I have now turned a nice tidy van into a skip! - Well you have to have a sense of humour to own a maestro - let alone a topless one!