Camper build thread

E_T_V
Site Admin
Posts: 439
Joined: Thu Jan 29, 2009 9:38 pm

21. More soundproofing!

Post by E_T_V »

Well as I'm spending a lot of time and effort building this van I thought it should be as quiet as possible. The work I did on my previous van made it a lot quieter and I aim to improve on this with the new van.

So the floor area has no deadening in it making it quite tinny in places. So I've applied rather a lot of thin deadening to help reduce the noise. As you can imagine due to the shape and size this took a while and some effort. Still it is done now and I think it looks good. How much noise it'll reduce I don't know yet but it can't hurt. The van floor is the only area of the van that has no deadening as standard.

Image

The deadening helps stop the panels ringing but it doesn't really absorb any noise, so for this I've fitted a 10mm heavy felt layer to the floor. This will help keep the van nice and quiet and also nice and warm as wool is a good heat insulator. More on insulation in a later update!

Image
E_T_V
Site Admin
Posts: 439
Joined: Thu Jan 29, 2009 9:38 pm

22. Insulation and random bits

Post by E_T_V »

The biggest downfall of my old campervan was it was too hot in summer and too cold in winter. So I decided that some insulation was needed (as the original had none). It needed to be thin enough not to take up lots of room (space is at a premium!), and it needed to keep heat in and out as needed. So I settled for the aluminium foil faced bubble wrap style insulation. This is thin enough to glue directly to the walls and comes recommended from others who have done camper conversions. So I bought lots of rolls and went about starting to fit it to my van. Its not stretchy in the slightest so it is difficult to work into curves and contours but I have done a reasonable job so far. Many people only use it on the flat surfaces, but I decided I want to do as good a job as possible. So here are my efforts so far.

Image

Image

The van originally was a work van so had big strong grills on the rear windows to deter theives.

They don't really suit the campervan so they had to go

Image

Image

Thats better!

Also to add a little convenience and creature comforts I fitted central locking all around the vehicle hooked upto a cat 1 alarm and immobiliser. I don't want anyone running off with my pride and joy after all this hard work.

Image
E_T_V
Site Admin
Posts: 439
Joined: Thu Jan 29, 2009 9:38 pm

23. Oil catch tank

Post by E_T_V »

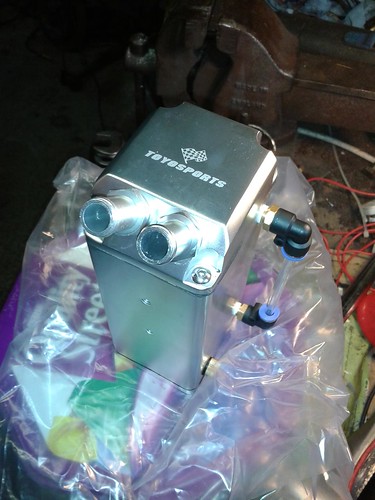
Due to the fact that I'm using a non standard turbo, means I need to re-configure the oil breather system. As such I'm going to fit a catch tank to trap the oil vapour rather than dumping it on the road, or recycling it back into the air intake

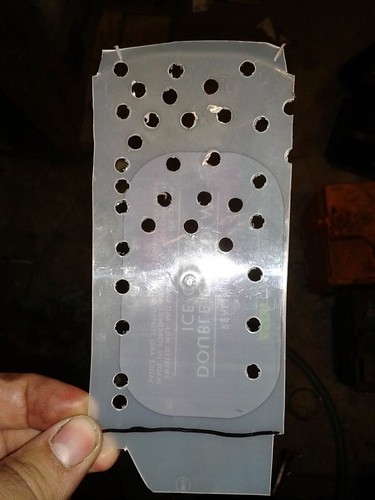
So we take one oil catch tank.
Image

Open it up and what do we see?
Image
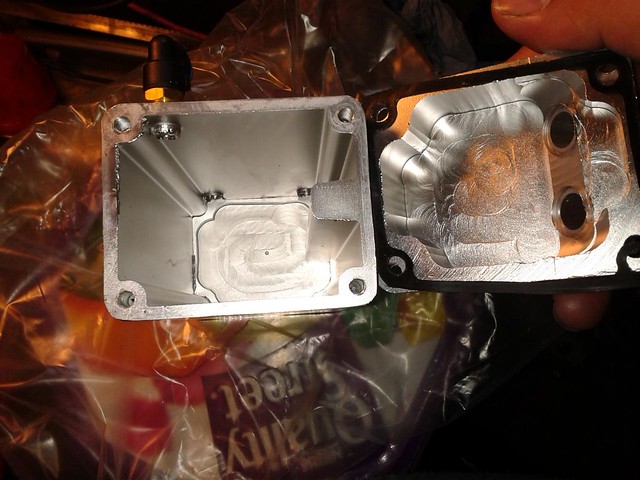
Well there is nothing in there. its empty. This means it isn't very effective as there is nothing there to condense the oil vapour and there isn't anything to stop the vapour going straight from the inlet straight to the outlet, i.e. its almost useless. However I have a plan....

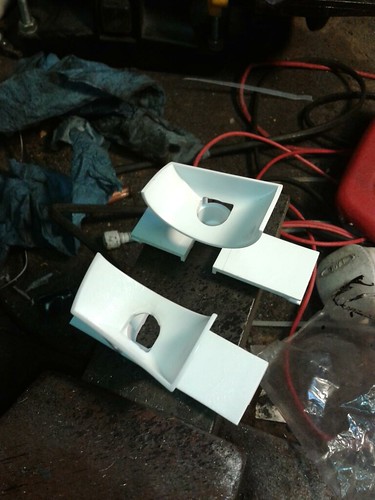
First we need to divide the chamber in half as best we can to prevent the gases short circuiting.
Here I've used a bit of plastic with holes drilled in it to divide the chamber in half. Note there are few holes at the top, and more at the bottom again to prevent short circuiting.
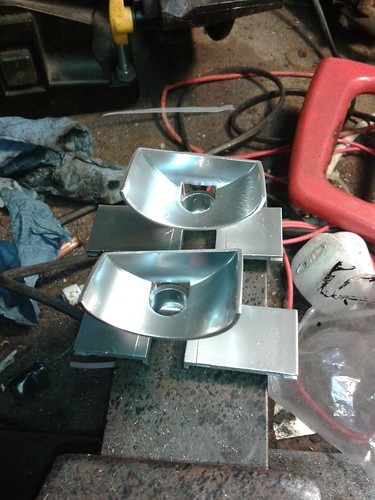
Image

Here it is in situ.
Image

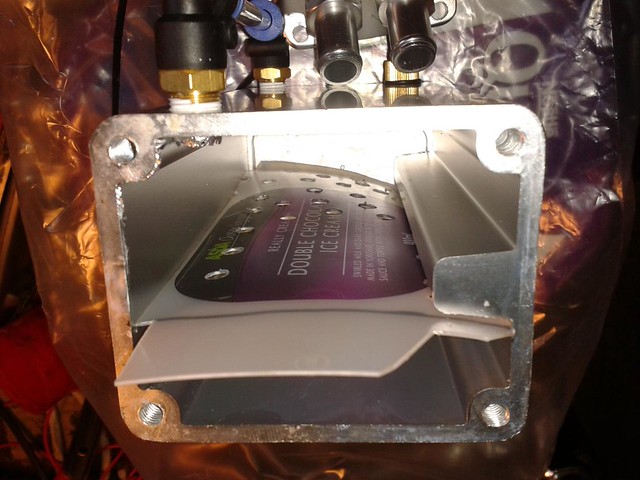
Note the top is cut to the profile of the top of the catch tank to prevent short circuiting too
Image

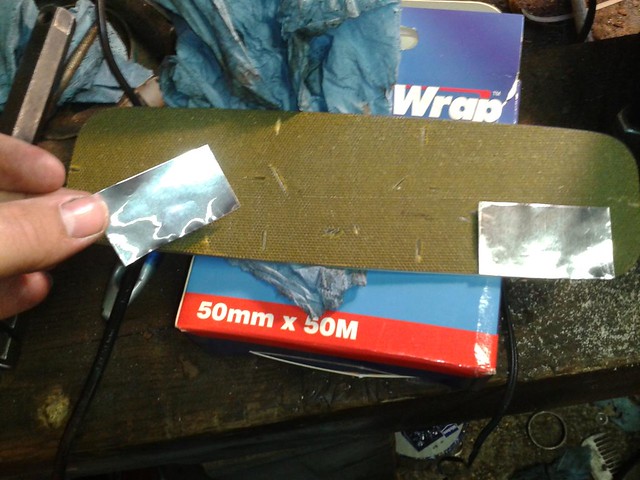
Then I added a little hot-glue to secure the sheet in place, and then gently stuffed each side with stainless steel wool, (usually used for stuffing exhaust silencers with). The inlet side was less stuffed and I made sure there was an empty passage to the bottom of the tank. I want the oil vapours to go to the bottom of the tank and percolate back through the stainless wool to the outlet. The wool helps catch the oil and remove it from the gases leaving the tank.
Image

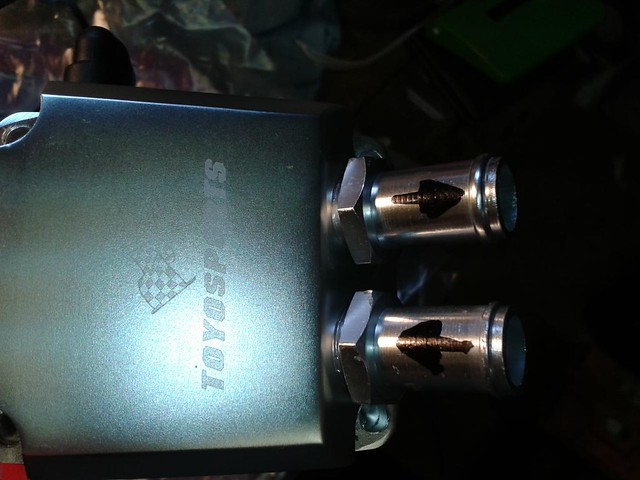
Because I have made the internals work better one way round I've marked the inlet and outlet on the stubs so that I install it the right way around.
Image#

Job done. A relatively useless bit of engine bay bling turned into something that'll work MUCH much better.
E_T_V
Site Admin
Posts: 439
Joined: Thu Jan 29, 2009 9:38 pm

24. LED interior lighting upgrades

Post by E_T_V »

The front interior light in the maestro van isn't fantastic. So I decided to supplement it with an interior mirror from an MGF. These have interior lights built into them. However as usual I'm not stopping there. As it is a camper I wish to minimise power consumption whilst improving the lighting. To do so I'm replacing many of the incandescent bulbs with more modern LED's.

Original interior lamp
Image

Modified LED interior lamp
Image

Comparison of old and new
Image

The MGF mirror. One LED installed (left), original bulb (right). Both have modified reflectors - see below.
Image

In my hamfistedness I managed to push one of the bulb holders inside the mirror unit. This meant I had to take it apart to re-fit it. With a bit of gently persuation the whole lot came apart and I saw the bit that needed replacing. However I noticed that the interior bulb reflectors were white?? Well that can't be too efficient so I gave them a lick of chrome paint to improve their output.

Image
Image
Thats better

There was also no reflector on the front which is the mirror glass. So I made one from some aluminium foil tape I've used on the insulation inside the van
Image

I've also replaced the bulbs illuminating the electric window switches with LED's also. The original orange illumination just didn't go with everything else in the van. Sorry no pics of that though.
E_T_V
Site Admin
Posts: 439
Joined: Thu Jan 29, 2009 9:38 pm

25. A few bits and bobs

Post by E_T_V »

Ok a micro-update here.

I've installed the oil catch tank

Image


I've tidied up the wiring a bit. Ok it still doesn't look pretty but its functional and safe. Note I've hooked up my big interior power supply on the top of the suspension turret.
Image

Inside this big power supply provides (fused) supplies to lots of power hungry things, or rather it will do when it is all hooked up. (Amplifiers, stereo, heated seats, and split charging system for the second battery)
Image

The alarm has been hooked up to the (added) electric windows so it now has full closure which works. Also note the glovebox lamp has been converted to LED
Image

The added electric window switches have very dull orange/red back lighting. Well ok they did they now have white LED's in them :)
Image

Lastly in a mission to ditch the dirty grey interior I need to do something with the door cappings. I've done this but I'm not 100% sure I'm keen now it is done. I was trying to just avoid spraying it black like anything else as it needs to have some character inside!
Image
Locked